
We Value Your Culinary Privacy
EatMee Recipes uses cookies to provide a personalized browsing experience, analyze recipe popularity, and serve relevant ads. You can review our full disclosure in our Privacy Policy.
Make authentic Creamed Corn with this foolproof recipe. Packed with rich traditional flavor, step-by-step photos, and cooking tips by Denisiya on EatMee Recipes.


Join over 60,000+ home chefs for weekly authentic Durban Indian cook-alongs, Instant Pot masterclasses, and family heritage recipes.
Creamed corn (which is likewise known by different names, for example, “cream-style corn“) is a sort of creamy based sauce with regular corn or sweetcorn.
On the off chance that you purchase creamed corn from your nearby grocery store, you miss the delight of making your own & eating a more rich, creamy & fresher version of this great dish.
Sweet corn is fine & dandy, obviously, however sweet corn simmered with milk & butter? All things considered, that is another paradise totally.
Corn is a decent wellspring of vitamin C & furthermore contains lycopene, the chemical that gives tomatoes their red shading.
Place the frozen sweetcorn or regular corn into a microwavable safe bowl (I used frozen sweetcorn). Cover with cling/saran/plastic wrap & poke some holes on it using a fork. Microwave on high for about 6-8 minutes.

In a medium sized pot or saucepan, add in the butter.
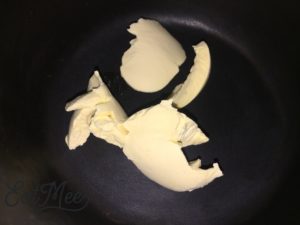
As the butter begins to melt, drop in the flour.
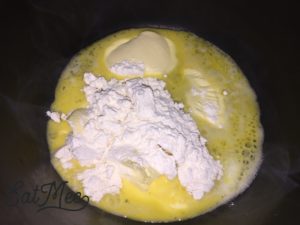
Mix well until it begins to form a thick paste. Keep mixing for about 3-4 minutes so that the flour cooks.
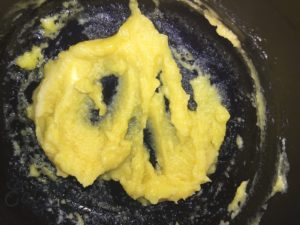
Add in the milk, about ½ cup at a time, & blend with a whisk. Cook over medium heat until thickened.

Next, add in the microwaved sweetcorn or regular corn.

Mix well. Add in sugar, salt & pepper (optional). I’m not a lover of pepper so I didn’t add it to this creamed corn.

Add more milk if the sauce is too thick or add a little flour if the sauce is too weak.

This creamed corn can also be added into cooked gem squash & served as a starter or a side to any meal.

I served this creamed corn as a side to a steak meal.

Expert kitchen guidance and troubleshooting for making the best Creamed Corn
Absolutely! You can easily tailor the heat by increasing or reducing the chili powder and fresh chilies to suit your family’s palate without compromising the authentic flavor profile.
Yes, you can freeze Creamed Corn in an airtight, freezer-safe container for up to 2 to 3 months. Thaw overnight in the refrigerator before gently reheating.
Reheat gently on the stovetop over low heat with a splash of water, or in the microwave covered with a damp paper towel to retain moisture.
Hi, I'm Denisiya! Food lover, recipe developer, and founder of EatMee Recipes. I specialize in authentic South African Durban Indian cuisine, comforting curries, and modern Instant Pot adaptations. Every recipe on this site is tested in my personal kitchen to ensure you get mouth-watering, foolproof results every time.
Explore more authentic Durban curries, traditional bakes, and comforting family favourites.
 American Food
Bagels are something we South Africans watched on American television shows…it isn’t very ...
 American Food
Being South African, I’ve never come across the famous Everything But The Bagel Seasoning ...
 American Food
This Spiced Roast Leg Of Lamb is so delicious, once you try it, you will never go back to ...
Have you tried this recipe or have questions for Denisiya? Join the conversation below.
No comments yet. Be the first to share your thoughts on this recipe!
Leave a Comment
Your email address will not be published. Required fields are marked *