
We Value Your Culinary Privacy
EatMee Recipes uses cookies to provide a personalized browsing experience, analyze recipe popularity, and serve relevant ads. You can review our full disclosure in our Privacy Policy.
Make authentic Mini Sausage Rolls with this foolproof recipe. Packed with rich traditional flavor, step-by-step photos, and cooking tips by Denisiya on EatMee Recipes.

Join over 60,000+ home chefs for weekly authentic Durban Indian cook-alongs, Instant Pot masterclasses, and family heritage recipes.
There’s something undeniably comforting about a warm, flaky sausage roll. They’re nostalgic, they’re satisfying, and they’re the kind of snack that disappears from the platter long before the party even begins. Today, I’m sharing a batch of mini sausage rolls that are simple, golden, and utterly irresistible.
These fun-sized versions are ideal for entertaining, lunchboxes, picnics, or those moments when you’re craving a warm and savoury homemade snack. With buttery puff pastry and flavourful sausage filling, they deliver maximum taste with minimal effort.
Perfectly snackable: One or two-bite treats that are ideal for sharing.
Beginner friendly: Uses store-bought puff pastry to keep things effortless.
Easy to customise: Switch up the sausage flavour, add herbs and additional spices, or sprinkle seeds on top.
Freezer-friendly: Make ahead and bake when needed.
Preheat oven to 180° Celsius or 356° Fahrenheit.
Ensure both the puff pastry and sausages are fully defrosted so they’re easy to work with. I’m using Fatima’s puff pastry but feel free to use other brands.

I’ve chosen spicy mutton sausages here, but feel free to use whatever sausage flavour you like best.

Remove the casings from the sausages and add the sausage meat to a bowl.

The casing is designed to hold the sausage in a firm shape, which can make the filling too tight or rubbery once baked inside puff pastry. Removing it gives you a softer, more tender filling.

Feel free to add additional spices and herbs if needed. I prefer my filling as is, so I won’t be adding anything in.

Grab portions of the sausage meat and press together in your hands.

Roll and mold the sausage meat into logs – similar to their sausage shape.

I got 6 logs out of it.

Unroll the puff pastry from the packaging. Do not roll out using a rolling pin.

Check if the sausage logs fit end to end (on the shorter side) on the pastry and reshape as needed.

Depending on how many logs of the sausage meat you make, measure out the puff pastry on the shorter side and cut into strips.

Place the sausage logs over each section. They should fit end to end.

Thereafter, roll the puff pastry over the sausage filling, leaving the seams at the bottom end.

Pinch them closed if the pastry is too short.

Continue this process until all of the puff pastry is rolled.

Trim the ends if you want them to look neater and more aesthetically pleasing.

Next, you may measure out or eyeball the measurements and cut the rolls to form smaller pieces – I have cut mine into bite sized pieces but you may cut them to form bigger Sausage Rolls.

Prepare a baking tray by lining it with baking or parchment paper & then lay the Sausage Rolls onto it, making sure there is a space in between them. I’ve used an insulated tray so there was no need to line it. Insulated trays are made with two layers of metal and an air pocket in between. This design prevents the bottom of pastries from browning too quickly, so the risk of sticking or burning is already reduced. Most insulated baking trays have a smooth, non-stick coating. Pastries, especially those with buttery puff pastry, release easily without the need for extra lining.
Next, use a knife to cut small slits on top of each sausage roll. This helps steam escape during baking and ensures the filling cooks evenly.

These sausage rolls can be packaged and frozen for 2-3 months. Do not thaw before baking – baking from frozen keeps the pastry crisp and prevents sogginess.

Crack the egg into a bowl & add in the milk.

Beat together using a fork.

Brush the egg wash over each Sausage Roll.

This step is optional – top with either sesame seeds or poppy seeds.

Bake them in the preheated oven for 20-25 minutes or until golden.

After baking, the tray may be greasy from the sausage fat. If you’re making a second batch, be sure to wipe it clean first.

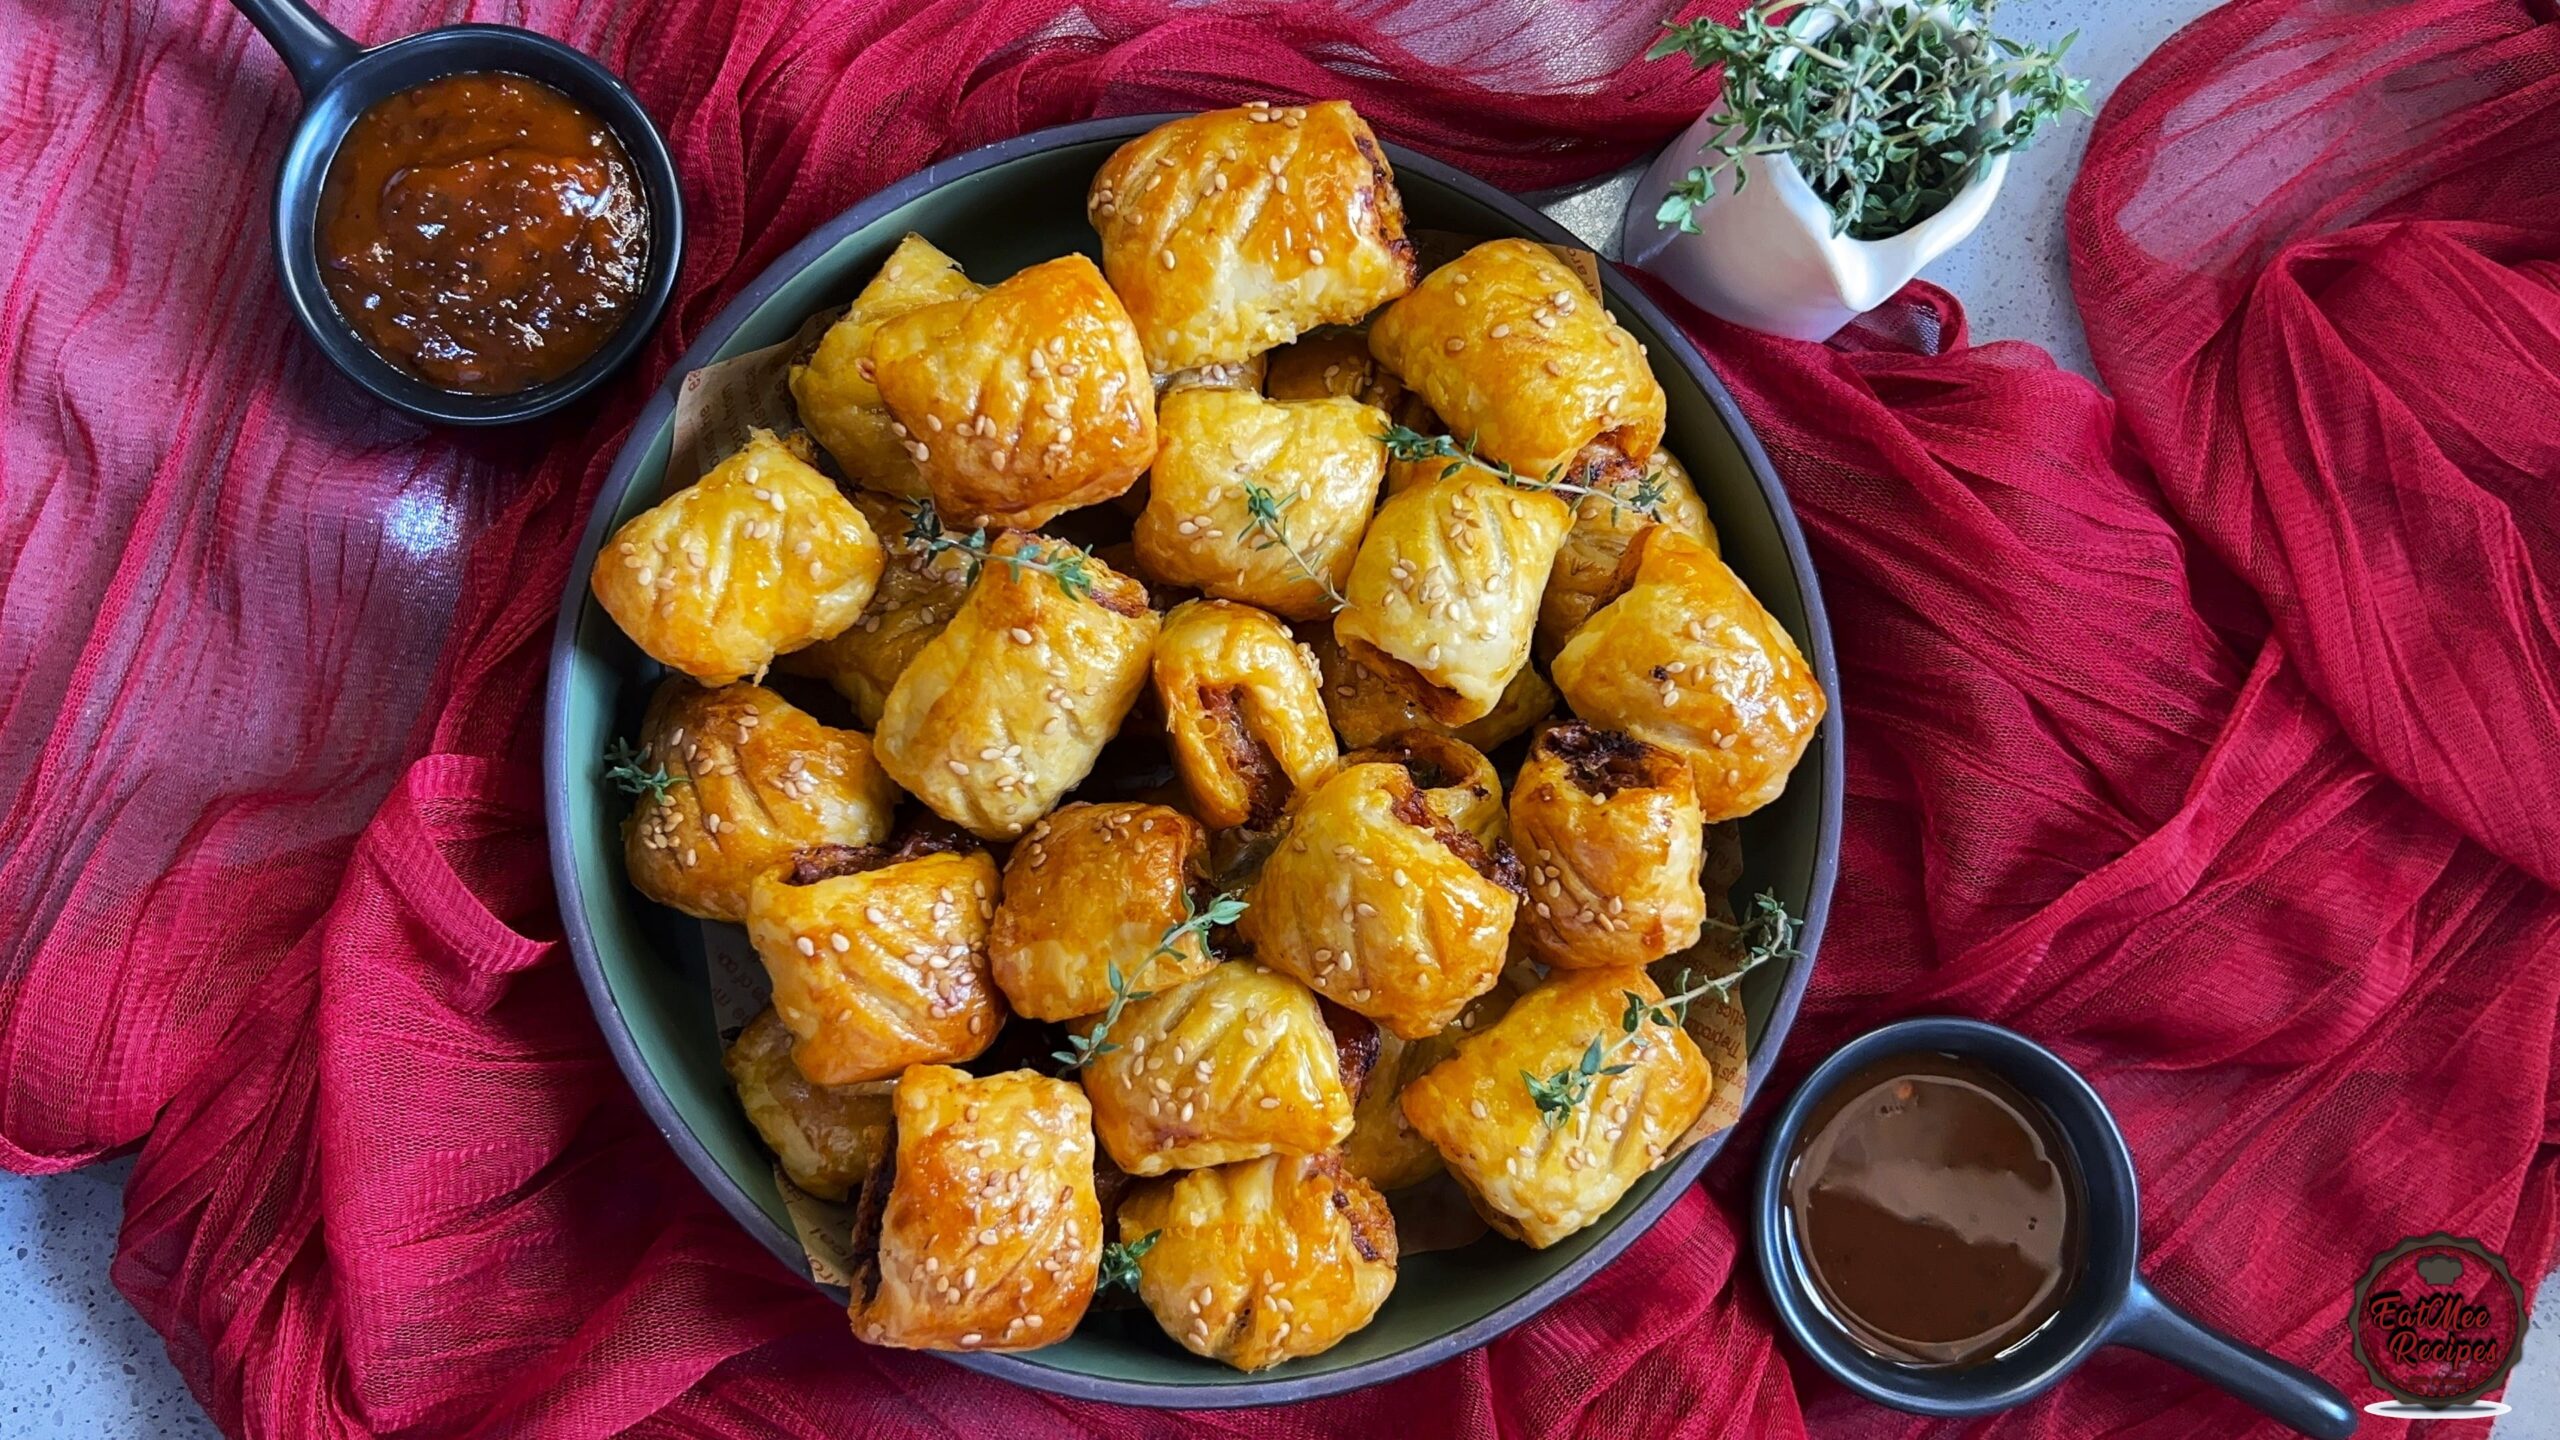
Place the golden mini sausage rolls on a platter and serve immediately – they’re best hot!

Sausage rolls are best enjoyed straight from the oven while the pastry is crisp and the filling is juicy. When they cool down, the fat from the sausages can solidify, making the rolls greasy and the pastry less flaky. Eating them warm ensures a golden, crisp exterior and a tender, flavorful filling.

These mini sausage rolls are delicious on their own, but they’re also perfect served with a dipping sauce. Try classic tomato sauce, chilli sauce, spicy mustard, sweet chili, or a creamy herb mayo to add an extra burst of flavour.

After baking, allow the sausage rolls to cool completely before storing. If you plan to eat them within a day or two, they can be kept at room temperature in an airtight container. For longer storage, place the cooled rolls in the refrigerator in an airtight container or wrapped tightly in foil or plastic wrap; they will keep well for three to four days. Reheat in the oven or air fryer for a few minutes to maintain their crisp texture.

Follow along with Denisiya's step-by-step video guide for Mini Sausage Rolls.
Expert kitchen guidance and troubleshooting for making the best Mini Sausage Rolls
Absolutely! You can easily tailor the heat by increasing or reducing the chili powder and fresh chilies to suit your family’s palate without compromising the authentic flavor profile.
Yes, you can freeze Mini Sausage Rolls in an airtight, freezer-safe container for up to 2 to 3 months. Thaw overnight in the refrigerator before gently reheating.
Reheat gently on the stovetop over low heat with a splash of water, or in the microwave covered with a damp paper towel to retain moisture.
Hi, I'm Denisiya! Food lover, recipe developer, and founder of EatMee Recipes. I specialize in authentic South African Durban Indian cuisine, comforting curries, and modern Instant Pot adaptations. Every recipe on this site is tested in my personal kitchen to ensure you get mouth-watering, foolproof results every time.
Explore more authentic Durban curries, traditional bakes, and comforting family favourites.
 Afrikaner Cuisine
In South Africa, Dumplings (Dombolo) is known to be steamed bread which is cooked over cur...
 Afrikaner Cuisine
Who else goes to Nandos & orders the livers? I know I do but sometimes we just want to sta...
 Afrikaner Cuisine
If you are a Nandos fan, you will definitely remember these Nandos Peri Peri Giblets being...
Have you tried this recipe or have questions for Denisiya? Join the conversation below.
No comments yet. Be the first to share your thoughts on this recipe!
Leave a Comment
Your email address will not be published. Required fields are marked *