
We Value Your Culinary Privacy
EatMee Recipes uses cookies to provide a personalized browsing experience, analyze recipe popularity, and serve relevant ads. You can review our full disclosure in our Privacy Policy.
Make authentic Brinjal Pakora with this foolproof recipe. Packed with rich traditional flavor, step-by-step photos, and cooking tips by Denisiya on EatMee Recipes.

Join over 60,000+ home chefs for weekly authentic Durban Indian cook-alongs, Instant Pot masterclasses, and family heritage recipes.
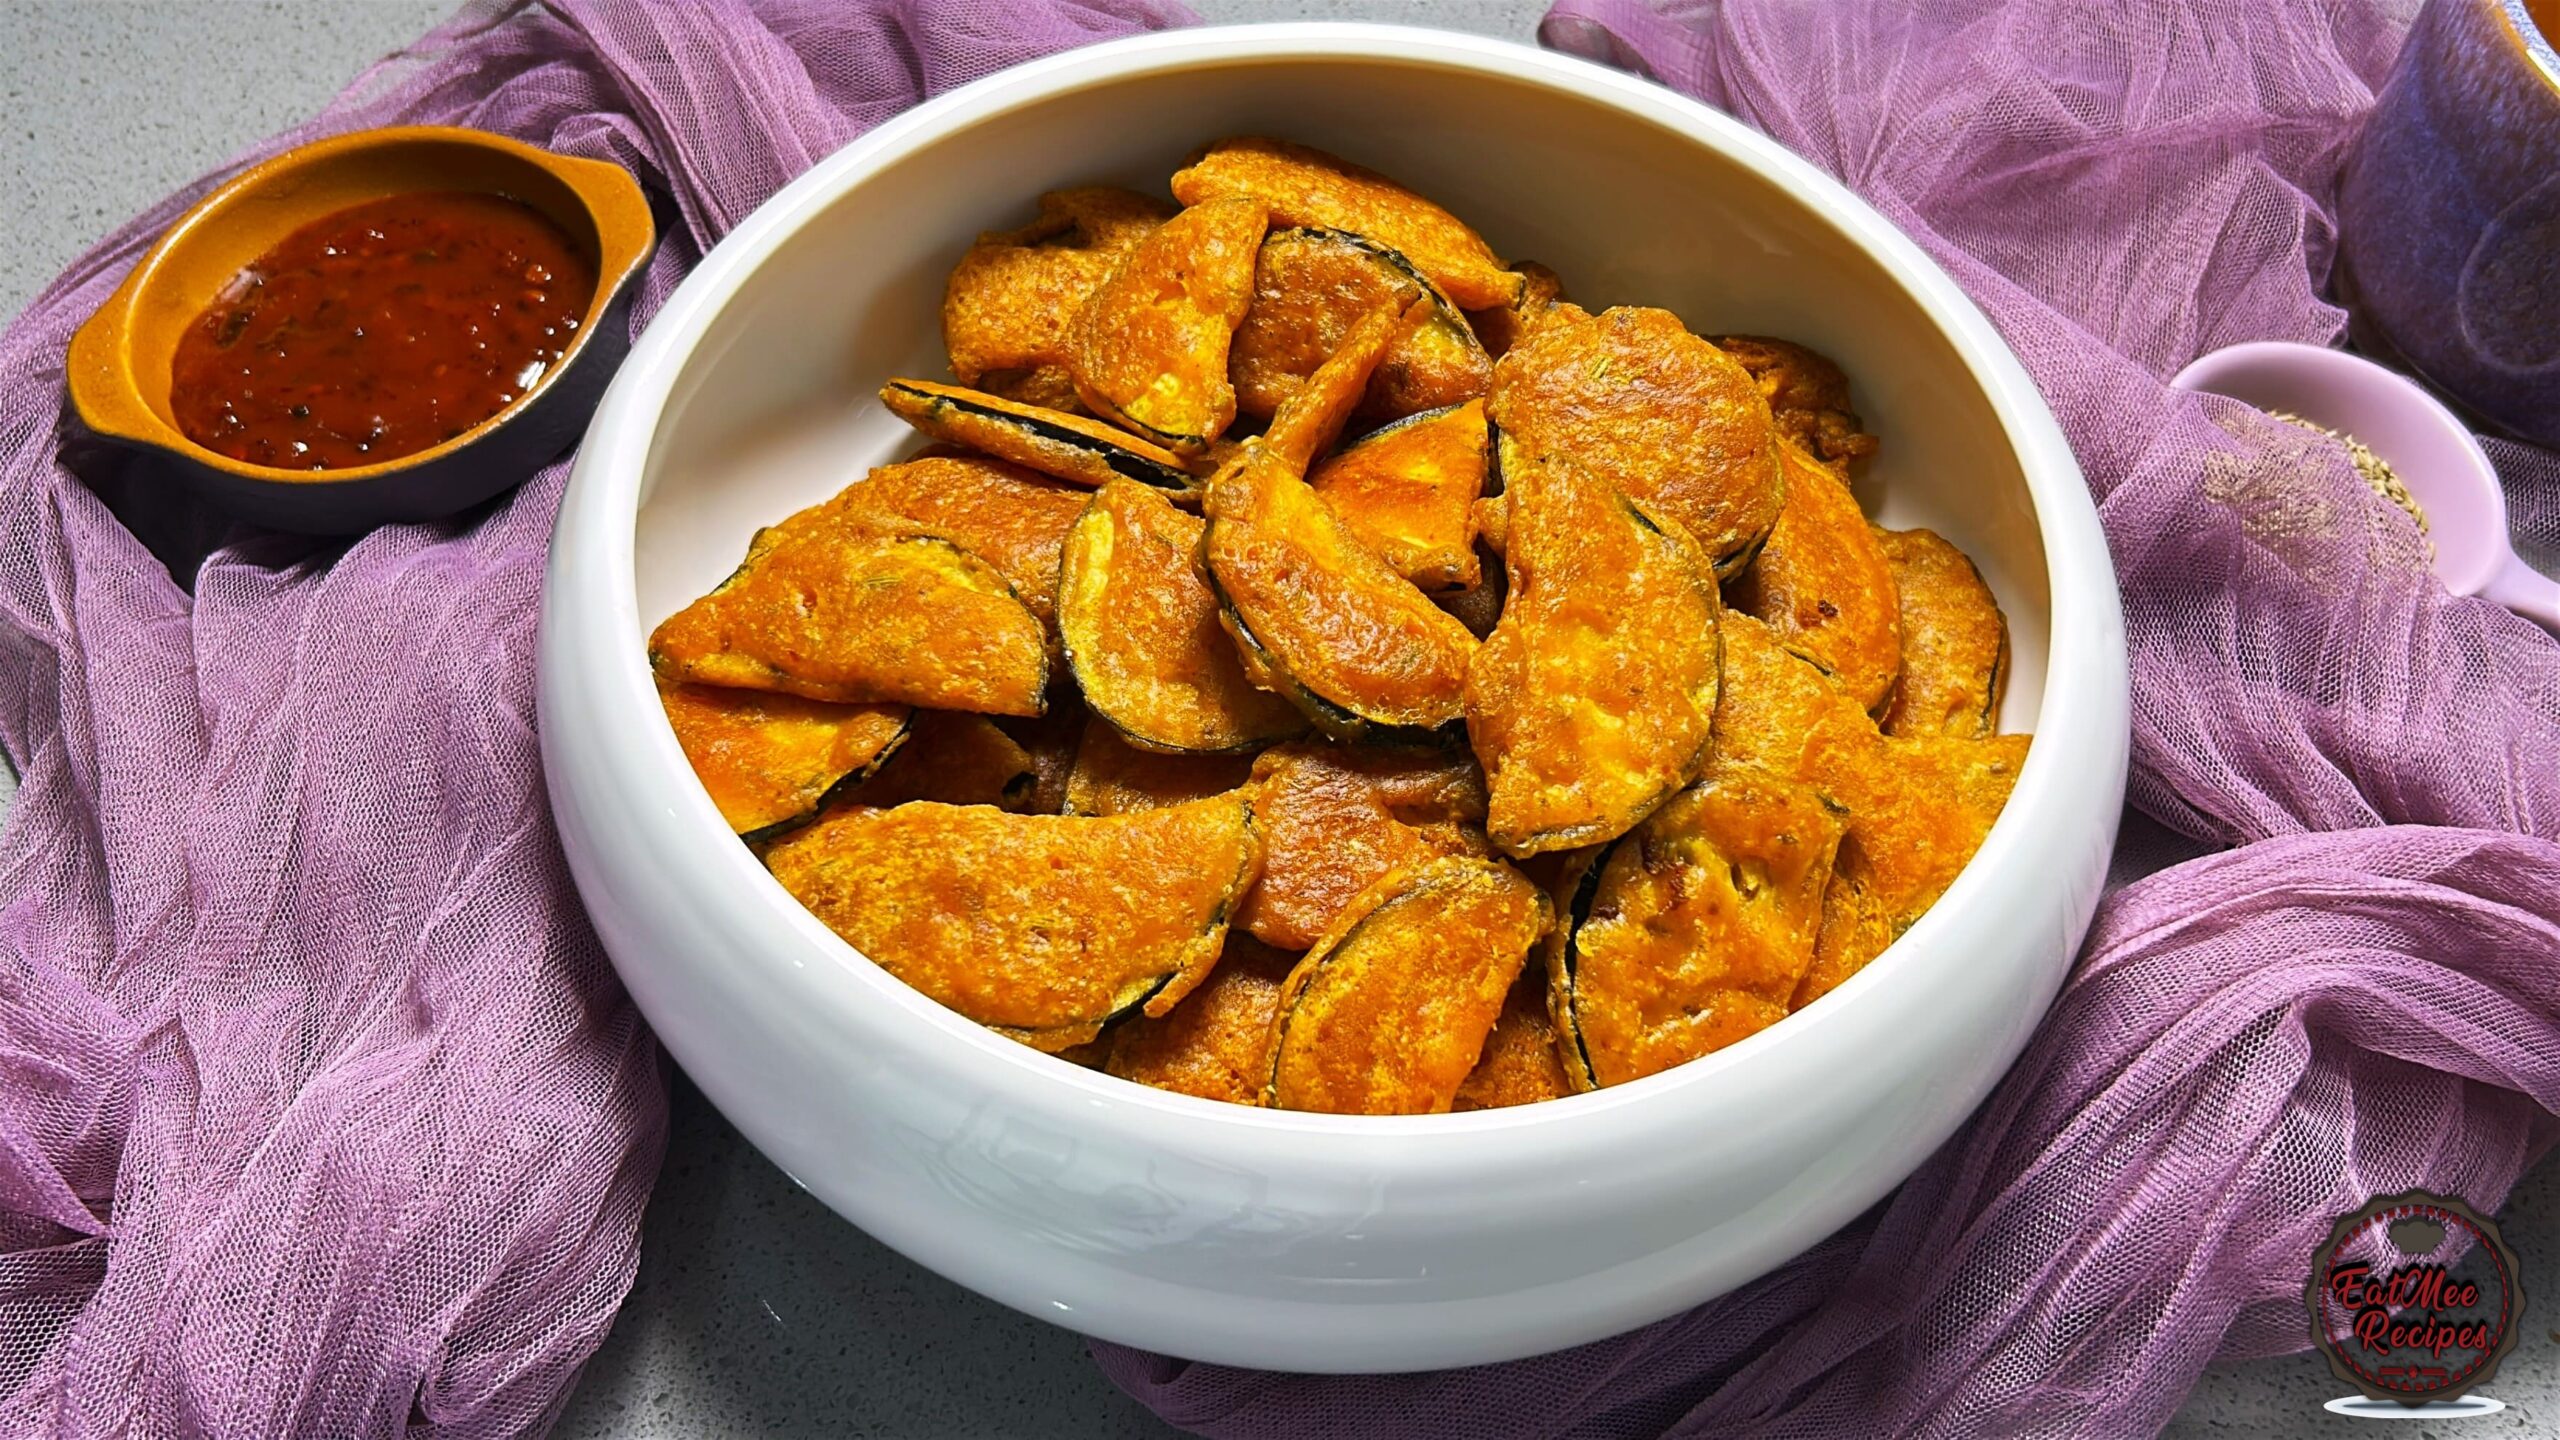
Crispy, golden and delicious, these Brinjal Pakoras are made with thin slices of brinjal coated in a warmly spiced chilli bite batter before being fried until beautifully crisp.
This is another one of those simple South African Indian recipes that reminds me of home. My mum makes her brinjal pakoras slightly differently from how my grandmother used to make them. My grandmother would leave the brinjal slices as whole circles, while Mum cuts each slice in half.
And I actually prefer Mum’s way! The smaller pieces become crispier all around, are easier to eat and make the perfect bite-sized pakoras. They’re almost like little brinjal chips and once you start eating them, it’s very hard to stop.
My favourite way to enjoy them is actually sandwiched between buttered bread, but they’re just as delicious served on their own, with a dipping sauce or alongside a meal.
Add the milk gradually.
Don’t add all the milk at once. The amount needed can vary slightly depending on the chilli bite mix and flour you’re using.
Get the batter consistency right.
The batter should cling nicely to the brinjal without being excessively thick. If it’s too thick, add a small splash of milk. If it’s too thin, add a little more chilli bite mix or flour.
Slice the brinjal evenly.
Around ½ cm thick works well. If the slices are too thick, the outside may brown before the brinjal becomes tender.
Don’t overcrowd the pan.
Frying in smaller batches helps maintain the oil temperature and gives you crispier pakoras.
Keep the heat at medium.
If the oil is too hot, the batter will brown too quickly. If it’s too cool, the pakoras can absorb too much oil.
Drain immediately.
Place the pakoras onto paper towels as soon as they come out of the oil.
Eat them fresh if you can!
They’re at their absolute best when they’re freshly fried – crispy on the outside and soft and tender inside.
This recipe makes approximately 25-30 bite-sized brinjal pakoras, depending on the size of your brinjal and how thick you slice it.
Serves approximately 4-6 people as a snack or side dish.
If you’re serving these at a gathering, I’d recommend making a double batch because they disappear very quickly!
Brinjal pakoras are best enjoyed fresh, but leftovers can be stored.
Allow the pakoras to cool completely before storing them in an airtight container.
Place a sheet of paper towel underneath the pakoras to help absorb excess moisture.
Store in the refrigerator for up to 2-3 days.
I wouldn’t recommend leaving cooked pakoras sitting at room temperature for an extended period, particularly in warm weather.
For the crispiest results, I recommend reheating them in an air fryer.
Air fryer:
Preheat to 180°C and heat for approximately 5-8 minutes, or until hot and crispy.
Oven:
Place in a preheated oven at 180°C for approximately 10-15 minutes, turning once if needed.
Avoid the microwave if possible. Although it will heat the pakoras, it can make the coating soft rather than crispy.
Yes, you can freeze cooked brinjal pakoras, although they are best when freshly made.
Allow them to cool completely, then arrange them in a single layer and freeze until firm. Transfer them to a freezer-safe container or bag and use within approximately 1 month for the best quality.
Reheat directly from frozen in an air fryer at 180°C until heated through and crispy, adding a few extra minutes to the cooking time as needed.
Start by preapring the batter. Mum uses the Pakco chilli bite mix, but you can use any brand of chilli bite mix.

Add the chilli bite mix to a deep mixing bowl.

Add the all-purpose or cake flour, corn flour and baking powder, followed by the turmeric powder, garam masala, cumin powder, chilli powder, salt and cumin seeds.

Mix all the dry ingredients together until evenly combined.

Gradually pour in the milk while mixing continuously. Mum uses the milk straight from the fridge, so there’s no need to bring it to room temperature.

You may need anywhere from ½ to ¾ cup of milk, so add it gradually until you reach the right consistency.

You want a smooth, medium-thick batter that is thick enough to coat the brinjal generously, but still flows easily from a spoon or whisk. It shouldn’t be so thick that it clumps onto the brinjal, and it shouldn’t be so runny that it slides straight off.

Place a 20 cm pan over medium heat and add approximately 500-600 ml vegetable oil, or enough oil to fry the pakoras comfortably. Allow the oil to heat while you prepare the brinjal. The oil should be hot enough that a little batter dropped into it sizzles immediately, but it should not be smoking.

Next, onto the brinjal.

Slice off the top of the brinjal and discard then slice the brinjal into rounds approximately ½ cm thick.

Once all the brinjal has been sliced, you can cover the slices with a paper towel while you prepare the rest. This helps prevent the cut surfaces from oxidising and turning dark.

Now cut each round in half, creating semi-circle pieces. My grandmother used to leave the brinjal as whole circles, but Mum cuts hers into smaller pieces. I actually prefer them this way because they become crispier all around and make perfect bite-sized portions.

Take each piece of brinjal and dunk it into the batter, making sure it is well coated.

Allow any excess batter to drip back into the bowl before carefully placing the coated brinjal into the hot oil.

Fry in batches and don’t overcrowd the pan, as this can cause the oil temperature to drop and result in greasy pakoras.
Fry for approximately 2-3 minutes per side, turning as needed, until the coating is deep golden, crisp and cooked through.

The brinjal inside should be tender while the outside is beautifully crisp.

Cooking time can vary slightly depending on the thickness of your slices and the temperature of your oil, so use the colour and texture as your guide.

Once golden and crispy, carefully remove the brinjal pakoras from the oil using a slotted spoon.

Place them onto a plate lined with paper towels to absorb any excess oil.

Transfer the pakoras to a serving platter and serve while they’re hot and crispy.

You can enjoy your brinjal pakoras with a dipping sauce or chutney.

Enjoy as part of a savoury snack platter, as a side dish alongside your favourite meal, or on their own as a snack

Or my favourite way – sandwiched between slices of buttered bread! There’s something about the crispy, spicy pakora with soft, buttery bread that just works.

What I love about this recipe is that it’s another little piece of our family food history.
Don’t add all the milk at once. The amount needed can vary slightly depending on the chilli bite mix and flour you’re using.
The batter should cling nicely to the brinjal without being excessively thick. If it’s too thick, add a small splash of milk. If it’s too thin, add a little more chilli bite mix or flour.
Around ½ cm thick works well. If the slices are too thick, the outside may brown before the brinjal becomes tender.
Frying in smaller batches helps maintain the oil temperature and gives you crispier pakoras.
If the oil is too hot, the batter will brown too quickly. If it’s too cool, the pakoras can absorb too much oil.
Place the pakoras onto paper towels as soon as they come out of the oil.
They’re at their absolute best when they’re freshly fried – crispy on the outside and soft and tender inside.
Follow along with Denisiya's step-by-step video guide for Brinjal Pakora.
Expert kitchen guidance and troubleshooting for making the best Brinjal Pakora
Add the milk gradually.Don’t add all the milk at once. The amount needed can vary slightly depending on the chilli bite mix and flour you’re using. Get the batter consistency right.The batter should cling nicely to the brinjal without being excessively thick. If it’s too thick, add a small splash of milk. If it’s too thin, add a little more chilli bite mix or flour. Slice the brinjal evenly.Around ½ cm thick works well. If the slices are too thick, the outside may brown before the brinjal becomes tender. Don’t overcrowd the pan.Frying in smaller batches helps maintain the oil temperature and gives you crispier pakoras. Keep the heat at medium.If the oil is too hot, the batter will brown too quickly. If it’s too cool, the pakoras can absorb too much oil. Drain immediately.Place the pakoras onto paper towels as soon as they come out of the oil. Eat them fresh if you can!They’re at their absolute best when they’re freshly fried – crispy on the outside and soft and tender inside.
This recipe makes approximately 25-30 bite-sized brinjal pakoras, depending on the size of your brinjal and how thick you slice it. Serves approximately 4-6 people as a snack or side dish. If you’re serving these at a gathering, I’d recommend making a double batch because they disappear very quickly!
Brinjal pakoras are best enjoyed fresh, but leftovers can be stored. Allow the pakoras to cool completely before storing them in an airtight container. Place a sheet of paper towel underneath the pakoras to help absorb excess moisture. Store in the refrigerator for up to 2-3 days. I wouldn’t recommend leaving cooked pakoras sitting at room temperature for an extended period, particularly in warm weather.
Air fryer:Preheat to 180°C and heat for approximately 5-8 minutes, or until hot and crispy. Oven:Place in a preheated oven at 180°C for approximately 10-15 minutes, turning once if needed. Avoid the microwave if possible. Although it will heat the pakoras, it can make the coating soft rather than crispy.
Yes, you can freeze cooked brinjal pakoras, although they are best when freshly made. Allow them to cool completely, then arrange them in a single layer and freeze until firm. Transfer them to a freezer-safe container or bag and use within approximately 1 month for the best quality. Reheat directly from frozen in an air fryer at 180°C until heated through and crispy, adding a few extra minutes to the cooking time as needed.
Hi, I'm Denisiya! Food lover, recipe developer, and founder of EatMee Recipes. I specialize in authentic South African Durban Indian cuisine, comforting curries, and modern Instant Pot adaptations. Every recipe on this site is tested in my personal kitchen to ensure you get mouth-watering, foolproof results every time.
Explore more authentic Durban curries, traditional bakes, and comforting family favourites.
 Indian Cuisine
My mum is sharing another one of her much-loved traditional South African Indian recipes. ...
 Indian Cuisine
Mum’s Pumpkin Curry is a simple, comforting vegetarian dish that proves you don’t need a l...
 Indian Cuisine
Welcome to Episode 10 of my How My Mum Makes It series, where I share the traditional Sout...
Have you tried this recipe or have questions for Denisiya? Join the conversation below.
No comments yet. Be the first to share your thoughts on this recipe!
Leave a Comment
Your email address will not be published. Required fields are marked *